A* Grid Traversing Bot
A simple implementation of A* is modified for a grid traversing object or robot. The robot moves to a new position after scanning and updating obstacles in each iteration of A*.
Output
Note: The output is 4.5X slower than it appears in the .gif below.
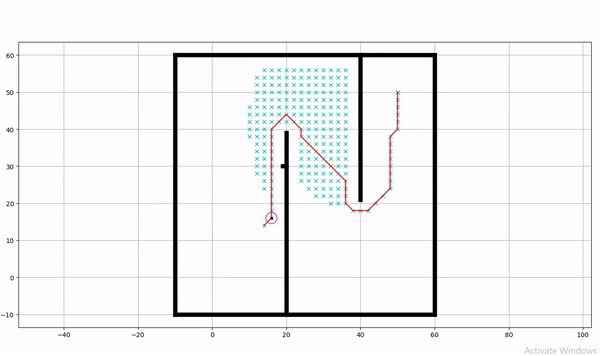
Fig: Output
Prerequisites
Basic knowledge of Python is required to understand the code. It also assumes a good sense of how basic A* works.
See A* Learning Sequence for a good set of resources for learning A* from scratch.
How It Works
This program runs A* repeatedly for every new position of the robot. The robot moves to a new position based on the planned path. The path it’s going to advance to is planned using the current robot position and obstacles positions. This process continues until the robot reaches its goal.
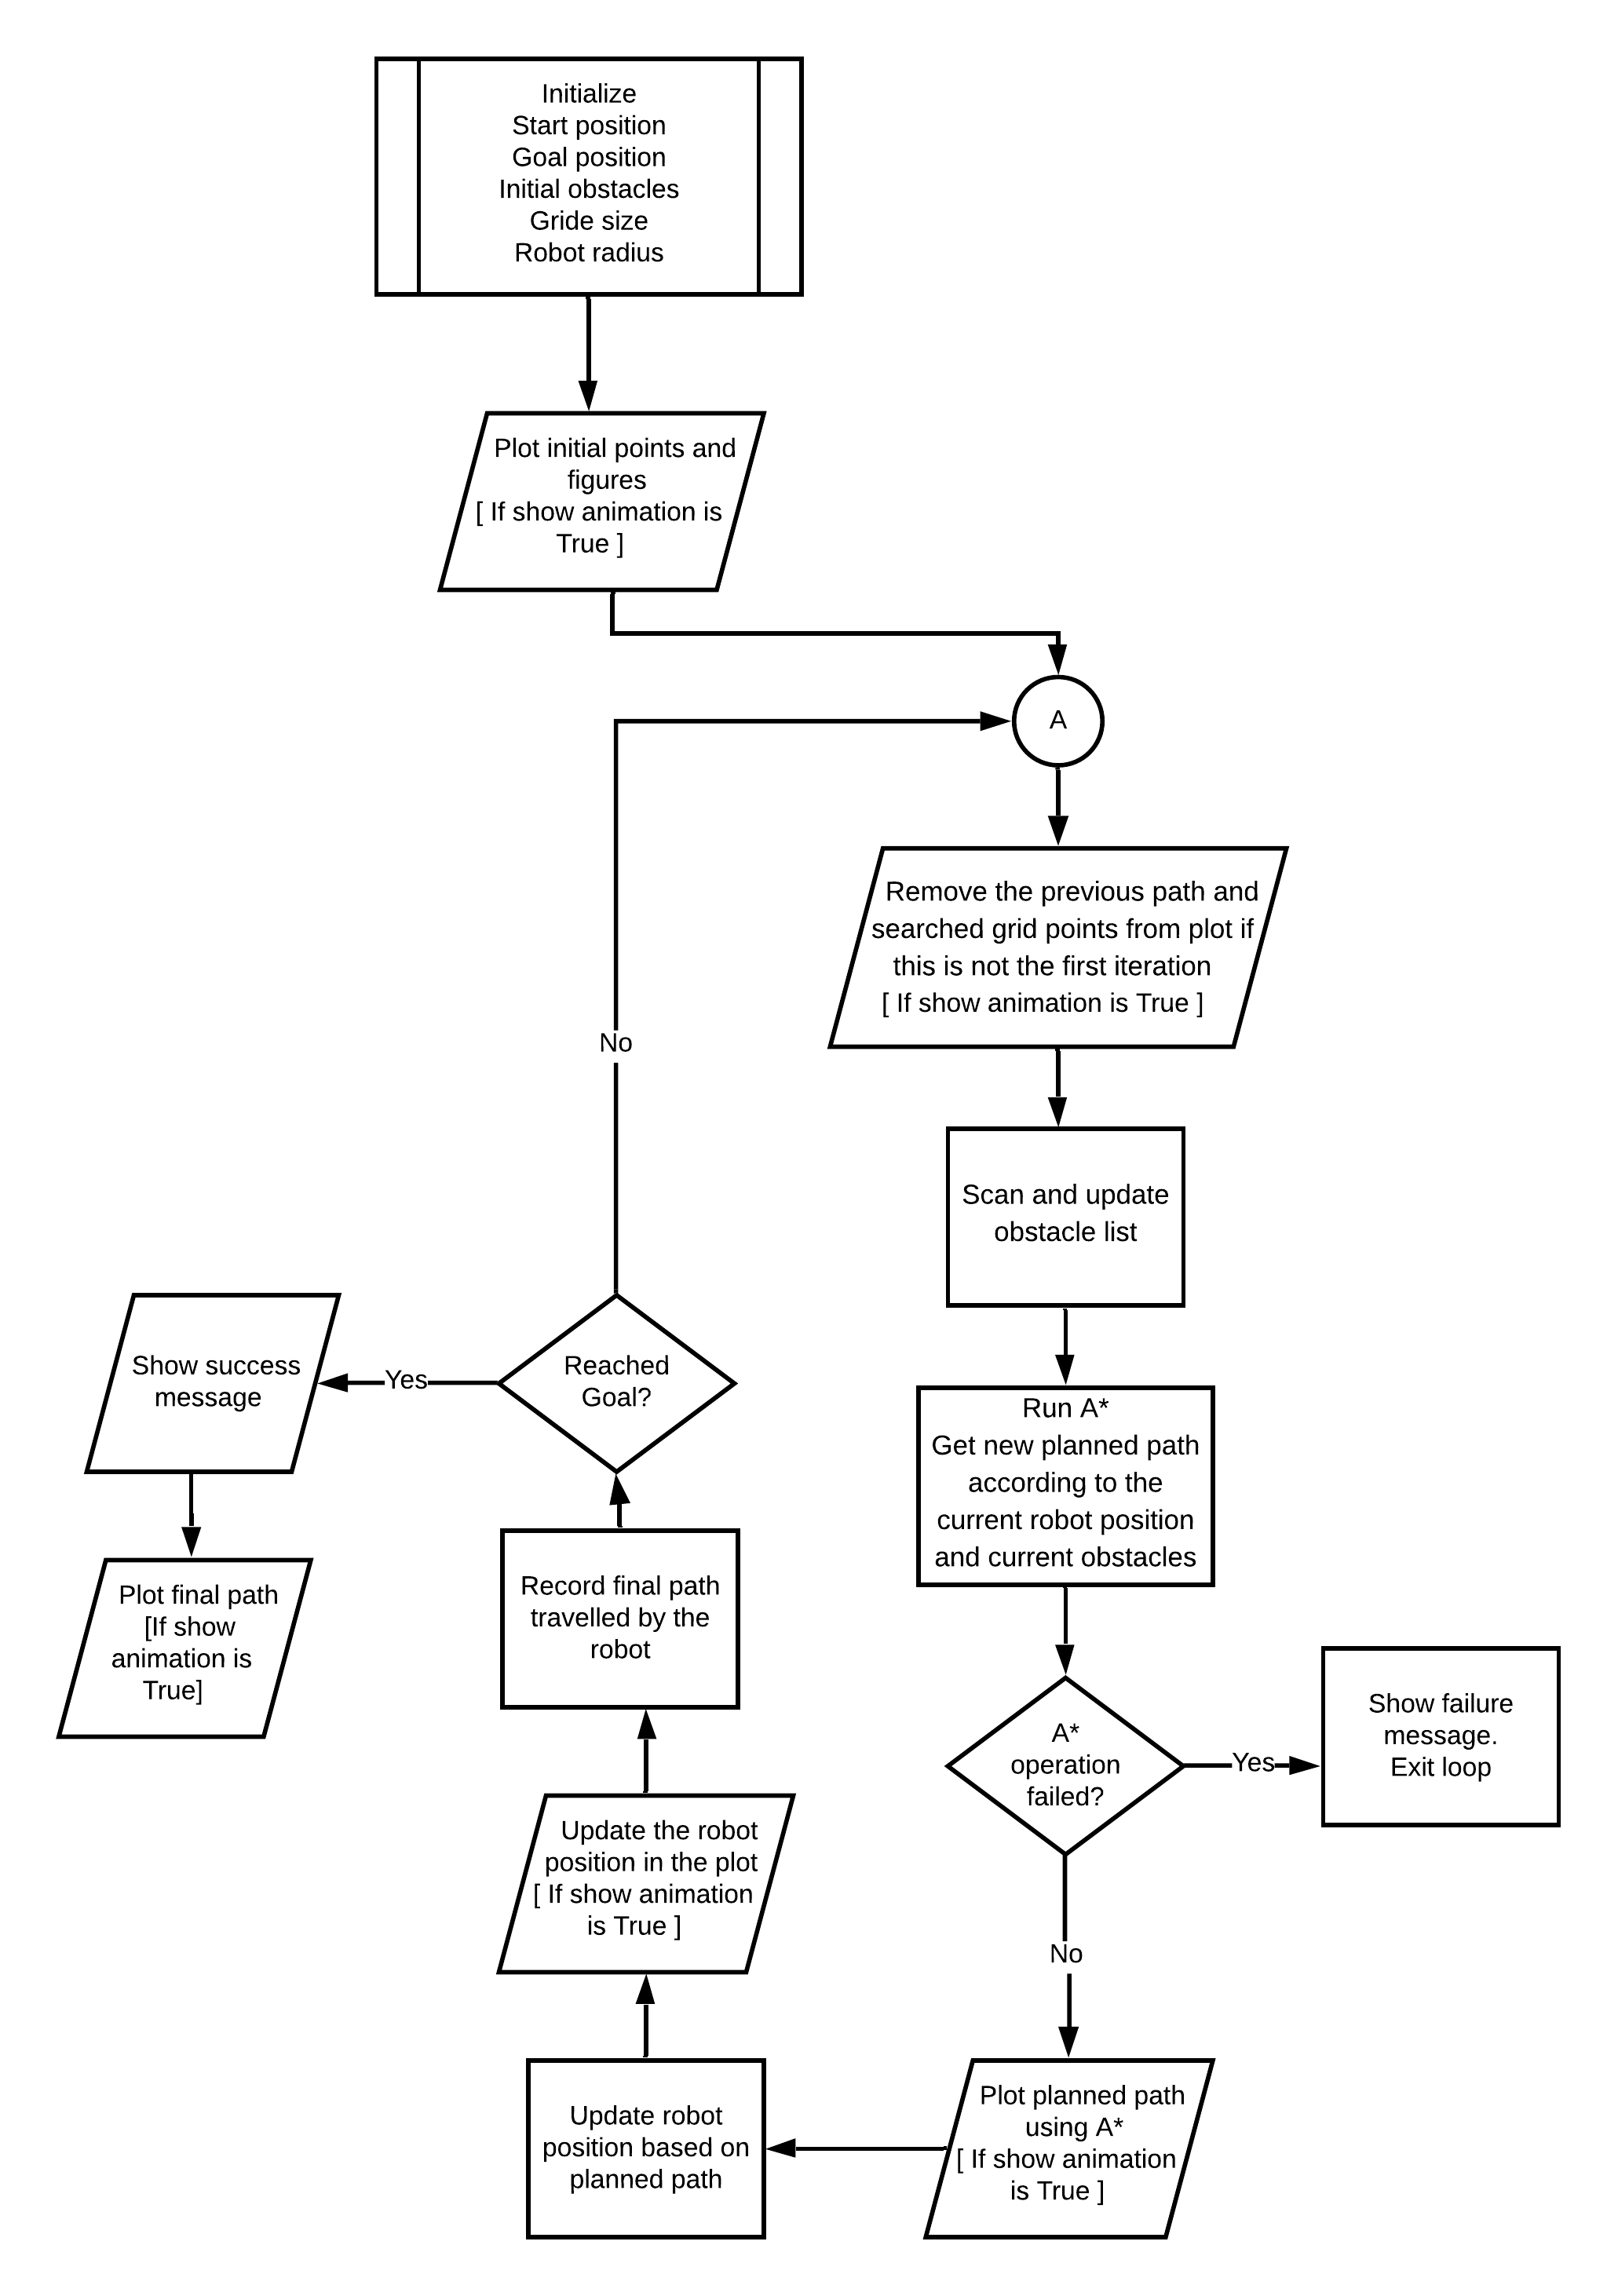
Key Notes
The code itself contains comments about how each method works. But let’s look at some parts of the code to get a quicker and better understanding.
The Initial Obstacles
The initial obstacles are loaded before entering the loop that runs A*. The black walls represent the obstacles. Indices of these obstacles are loaded using def obsplan() . These obstacles do not change during the iterations.
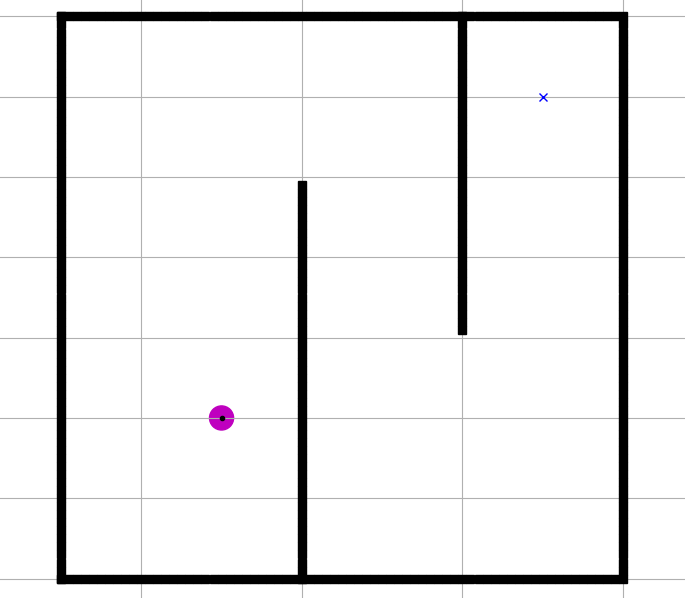
Fig: Initial Obstacles
Secondary Grid
The field for traversing the robot is enclosed by the secondary grid. As we can see from the previous section, it’s part of the primary obstacles. We call it “grid” because it has its own coordinate system based on the specified grid_size. For this version of the code, this grid ranges from 0 to 35 in both axes. It’s different from the default grid indexing. The conversion from and to the secondary grid is explained at the beginning of the code.
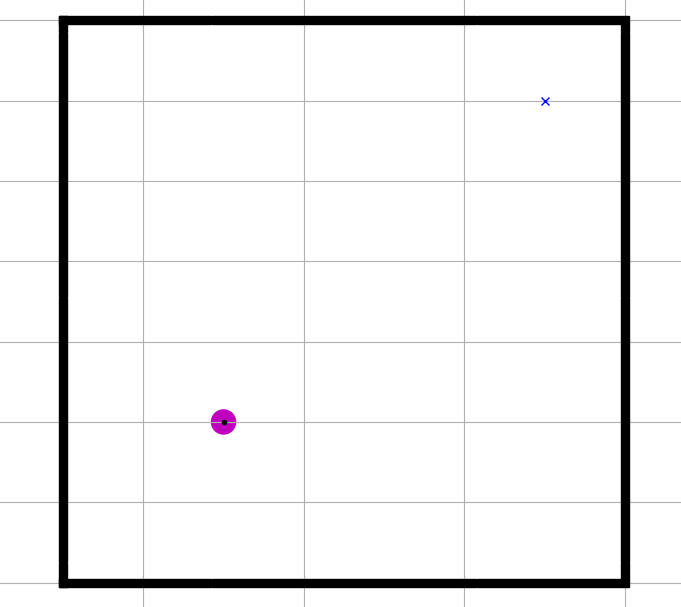
Fig: Secondary Grid
Wall Padding and Obstacle Map Generation
Wall padding is used to make sure that the robot doesn’t collide with obstacles. Each obstacle has been considered to be a center of a circle that has a radius equal to the Wall_padding. The robot itself is considered to be an object surrounded by a clearance circle of radius equal to robot_radius. We just measure the center distance of the robot and an obstacle and compare it to the sum of the radii of both circles. It’s based on the corollary which states “For two circles touching each other, the distance between their centers is equal to the sum of their radii (if the circles touch each other externally) or the difference of their radii (if the circles touch each other internally)”.To know more about this, visit this page
Obstacle map is generated based on the secondary grid. What it means is that each point in the 35 X 35 grid gets scanned to check if it’s too close to the obstacles. The value of the point is assigned as 1 if it’s dangerous and 0 if it’s safe. The point is indexed using it’s secondary grid indices in a 2D array. This operation is done by the def obsmap method.
Generating New Obstacles
For each iteration of A*, a set of new obstacles is generated in different locations using the def scan_Obstacles method. The rate of obstacle generation can be modified by adjusting the growth rate for each obstacle.
def horizonal_line, whenever called, produces obstacles horizontally as per the growth rate, direction, and position specified by the def scan_Obstacles method.
def vertical_line generates vertical obstacles in the same way as def horizonal_line does.
A* Learning Sequence
It’s always helpful to have a shortlist of resources you found useful when you learned something. It can also be a major time-saver for anyone who’s trying to learn the same thing for the first time. It will be helpful for beginners to follow the list sequentially before stepping on to understanding this project.
- A* Pathfinding (E01: algorithm explanation)-A* Intuition I
- Graph Data Structure 6. The A* Pathfinding Algorithm-A* intuition II
- Wikipedia Page-The theory
- The next step is to read an actual code based on A*. Before jumping into that, make sure you have basic Python and Python OOP knowledge.
- Implementation of A* using Python
Acknowledgments
The code posted here was used as a skeleton for the project.